Installiamo e configuriamo qemu-kvm su Ubuntu LTS 16.04 per virtualizzare altri OS come Linux o Windows
Assicuriamoci prima di tutto che la nostra CPU supporti la virtualizzazione
egrep '(vmx|svm)' --color /proc/cpuinfo
Se questo comando ci da output, allora possiamo passare all’installazione dei pacchetti necessari
apt-get install qemu-kvm libvirt-bin virtinst bridge-utils
Le directory di default di KVM saranno le seguenti:
- Default directory: /var/lib/libvirt/
- ISO images for installation: /var/lib/libvirt/boot/
- VM installation directory: /var/lib/libvirt/images/
- Libvirt configuration directory for LVM/LXC/qemu: /etc/libvirt/
Aggiungiamo un utente su cui far girare le vm
adduser mioutentexVS
#aggiungiamolo al gruppo libvirtd
adduser mioutentexVS libvirtd
Di default le nostre VM utilizzeranno virbr0, per avere informazioni su questa rete ci basterà lanciare il comando
virsh net-info default
L’output dovrebbe essere simile al seguente
<network connections='1'>
  <name>default</name>
  <uuid>1c0abaa3-8d17-45b5-85e9-c0d48cec94f9</uuid>
  <forward mode='nat'>
    <nat>
      <port start='1024' end='65535'/>
    </nat>
  </forward>
  <bridge name='virbr0' stp='on' delay='0'/>
  <ip address='192.168.122.1' netmask='255.255.255.0'>
    <dhcp>
      <range start='192.168.122.2' end='192.168.122.254'/>
    </dhcp>
  </ip>
</network>
Scarichiamo ora una iso minimal per fare la nostra prima installazione
cd /var/lib/libvirt/boot/
wget http://mirrors.kernel.org/centos/7/isos/x86_64/CentOS-7-x86_64-Minimal-1511.iso
Ora loggiamoci come utente e creiamo una VM
su mioutentexVS -
virt-install \
--virt-type=kvm \
--name centos7 \
--ram 1024 \
--vcpus=1 \
--os-variant=rhel7 \
--hvm \
--cdrom=/var/lib/libvirt/boot/CentOS-7-x86_64-Minimal-1511.iso \
--network network=default,model=virtio \
--graphics vnc \
--disk path=/var/lib/libvirt/images/centos7.img,size=20,bus=virtio
L’output sarà
Starting install...
Allocating 'centos7.img'                                                                     |  20 GB     00:00
Creating domain...                                                                           |    0 B     00:00
WARNING  Unable to connect to graphical console: virt-viewer not installed. Please install the 'virt-viewer' package.
Domain installation still in progress. You can reconnect to
the console to complete the installation process.
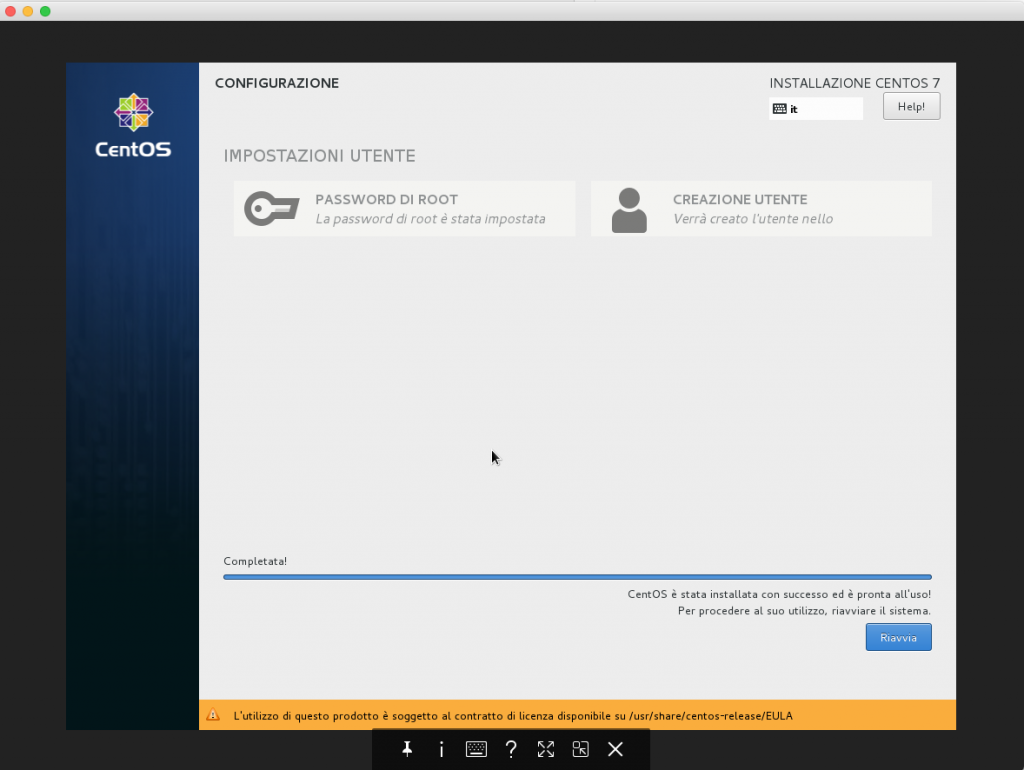
Ora potremo connetterci via VNC alla VM e terminare l’installazione. Prima di tutto vediamo su che porta è in ascolto VNC
virsh dumpxml centos7 | grep vnc
L’output sarà
<graphics type='vnc' port='5901' autoport='yes' listen='127.0.0.1'>
Ora sarà necessario creare un tunnel sul nostro PC. Ad esempio su OSX, aprite il terminale e lanciate il seguente comando
ssh mioutente@server1.mioserver.com -L 5901:127.0.0.1:5901
Installiamo l’estensione VNC viewer su google Chrome
https://chrome.google.com/webstore/detail/vnc%C2%AE-viewer-for-google-ch/iabmpiboiopbgfabjmgeedhcmjenhbla
ora connettiamoci al nostro server VNC inserendo localhost come host e 5091 come porta

Fonte: http://www.cyberciti.biz/faq/how-to-install-kvm-on-ubuntu-linux-14-04/


